[ Notes | Emails | Contacts | Calendar | Documents | Tasks | Web Links | Time | Reporting ]
Emails
Feng Office can act as a webmail client for its users, and this is really useful as you will then be able to share your emails with your colleagues without actually having to forward them.
What happens in case you are not available in your office, but your colleagues need to make sure of certain emails? In case you have classified your incoming and outgoing emails into the right Project, Client, Folder, or Workspace - as long as your colleagues have reading access over the emails there, they will be able to read them and know what is going on.
Another useful thing to have along this module is the Email Rules, which are real-time savers!
Note: The email integration module relies on the user's mail server. The service provided is for downloading email into Feng Office, classifying it, and integrating it within the Feng Office system and DataBase. This means you need to possess an email account before setting it up within Feng Office.
List view
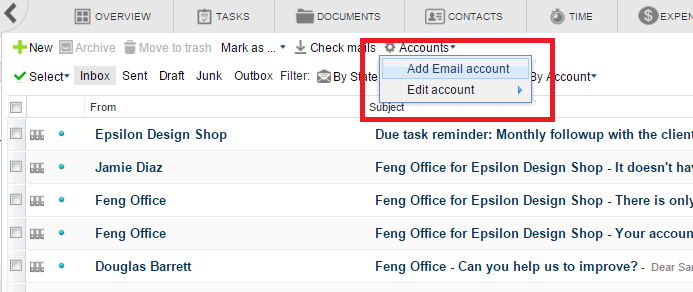
The following picture shows the toolbar used to manage emails within Feng Office, and you may find further information about its actions below.
Most used actions:
- New: Creates a new email message.
- Check mails: Manually checks all the email accounts where the users have permission for new messages.
Note: In case you are subscribed to Feng Office Cloud or Feng Office On-Premise services, the emails will be automatically checked every certain number of minutes.
Accounts:
- Add Email account: Let's you add an email account.
- Edit account: Lets you edit an existing email account, as long as you have permissions.
Email boxes:
- Inbox: Shows email messages that have been received.
- Sent: Shows email messages that have been sent.
- Draft: Shows email messages that have been saved as a draft (and not sent yet).
- Junk: Shows email messages that have been received and are considered junk.
- Outbox: Shows email messages that have yet to be sent.
Deleting & Archiving:
- Move to trash: Moves the currently selected email messages to the trash.
- Archive: Archives the currently selected email messages.
Mark as:
- Mark as read: Marks the selected email messages as read.
- Mark as unread: Marks the selected email messages as unread.
- Mark as spam: Marks the selected email messages as spam (junk). Bear in mind that the system remembers this selection for future emails that come from the address marked as spam.
Email Rules
- You need the Advanced Email plugin
Filtering
Filter By State:
- View all: All emails will be listed, whether they have been read or not.
- Read: Only read emails will be shown.
- Unread: Only unread emails will be shown.
Filter By Classification:
- View all: All emails will be listed, whether they have been classified or not.
- Classified: Only classified emails will be shown.
- Unclassified: Only unclassified emails will be shown.
Filter By Account:
- View all: Emails from all accounts will be shown (you need to have the right reading permissions)
- [Account Name]: You will be able to select one of your own email accounts to filter the email messages by it.
New email
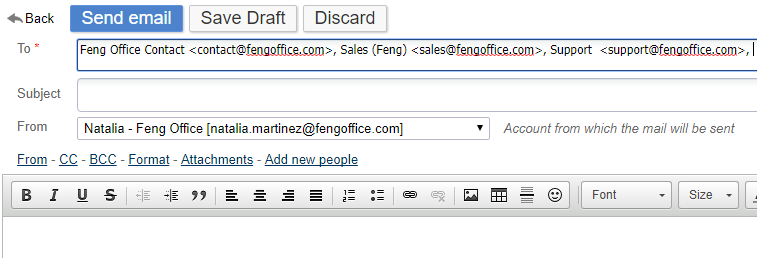
In order to send a new email within Feng Office, you have to make sure that the logged-in user has at least one email account of their own or permissions within other email accounts.
In case the user has multiple email accounts, the user can select from which account to send the email message through the From option. By default, the selected email account will be the one he set as the default account.
Adding or editing email accounts
Adding an email account to Feng Office is similar to adding an email account to your desktop mail client (i.e., Thunderbird, Outlook, Apple Mail). You basically have to enter your email address, the mail server addresses (POP3/IMAP and SMTP), your login details, and encryption settings.
You have two options for adding an email account:
1 - Go to the email module and click on “Accounts” - “Add Email Account”
2 - (For SuperAdministrators only) Go to “Settings” - “Configuration” - “Email Module” - “Email Accounts”. You will be redirected to the following screen, where you can add, edit, and delete email accounts:
Let's see how to do this step by step:
Initial Settings
Account name: Name used to identify the email account within Feng Office.
Email Address: Your email address.
Incoming Settings
Account ID: Your email address or username for the server.
Password: Your email account password.
Server address: The address to your POP3/IMAP email server.
Connection Method:
- POP3
- IMAP: When selected, you will then have to click on Fetch IMAP folders to select the boxes where you will be looking for emails. For Feng Office Professional and Enterprise editions, the IMAP sync plugin has an extended set of tools. Please follow this article to find out more.
Use SSL for incoming email connection: If your email server requires SSL encryption, please enable this option.
Delete emails from the server: In case you would like to delete the emails from your Mail Server and keep them exclusively within Feng Office, you should enable this option, and select a number of days. For instance, if you select 5, emails older than 5 days will be automatically deleted from your email server.
Mark emails as read in the email server when receiving them in Feng Office
Preserve emails' state (read, unread) when receiving them in Feng Office
Autoclassify to workspace: You may select a client, project, folder, workspace, or even a tag, where to classify the emails by default if you wish to. In case you do this, any other user with access to the client, project, folder, or workspace in question will be able to read all of your incoming emails. If you wish not to do this, you may select nothing, and emails will be unclassified, and only you will be able to read them until you reclassify them. Otherwise, you may select a specific folder or workspace for where to keep the emails.
Outgoing Settings
SMTP Server: The address of your SMTP email server.
SMTP Server Port: The port is required to connect to the SMTP server.
SMTP Server Authentication:
- Use incoming: use the same username/email address and password as your incoming settings
- No authentication: in case it does not require it
- Input SMTP username and password: you will be prompted to add the username and password
Secure Connection:
- SSL
- None
- TLS
NOTE: If you are unsure of the incoming and/or outgoing settings for your email account, please take a look at this article on the most common mail account settings (Gmail, Outlook, Office 365, Yahoo, etc.)
Personal Settings
Sender Name: The name that will appear when you send emails.
Default Account: Enable this option if this is going to be the main account for the logged user.
Signature: Signature to be used by default for the logged user and this email account.
Account Permissions
When enabling the Account Permissions section above (like in the screenshot from this section), you will be able to manage the permissions for this email account. This means you can share it with other users in different ways:
- No access: The user will not have access to the email account
- Can read/write emails: The user will be able to read and write emails related to/from this account. In this case, the user will also be able to edit it and set up their own Personal Settings for the account.
- Can read/write emails and edit account: Same as below, but the user will also be able to change the email account settings
Deleting email accounts
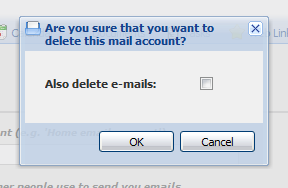
You can delete an existing email account at any time. To do so, open the account settings form and click the “Delete mail account” button:
An alert dialogue will then ask you to confirm this action and give you the option to delete any existing emails from that account as well:
In case you choose to delete all of the emails, it may take a while to process, depending on the number of emails you have there, so please be patient.
Detail view
Actions
- Reply: Click here to make a reply forwarded to the email account from which the email message comes. You may add more email accounts as recipients if you would like to do so.
- Reply to all: Click here to make a reply forwarded to every single email account that has been contacted, plus the email account from which the email message comes. You may add/remove email accounts as recipients if you would like to do so.
- Forward: Click here to forward the email message you have received to anyone you want.
- Move to trash: Lets you move this email message to the trash.
- Print view: Displays a printable version of this email message and calls the print command.
- Classify: Allows to assign this email message to a certain workspace (classify).
- Archive: Let you archive this email message into the Archived Objects folder.
- Report as Spam: Moves this email message to the Junk folder. Not Spam: Moves this email message to its previous folder. Bear in mind that the system remembers this selection for future emails that come from the address marked as spam.
- Mark as unread: Marks this email message as unread. Mark as read: Marks this email message as read.
- Download email: Allows you to download the email message to your computer.
- View History: Lets you read the email message's history.
Properties
- Subscribers: People who are subscribed to this email message. Clicking on a subscriber's name takes you to the corresponding user profile.
- Created by: Users who received this email message. Clicking on this user's name takes you to the corresponding user profile.
Email and documents
This section will help you organize your files better, explaining how to choose what to do with the documents attached to your incoming emails.
If you go to: settings (top on the right, clicking your user name) → edit preferences → email options You will find the following configurations:
“Automatically classify email attachments when receiving emails”: When new emails arrive, they are automatically classified into certain spaces. If they have attachments, they will be classified with them, helping you keep all related information in the same spaces automatically.
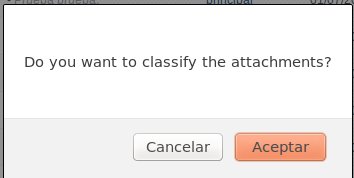
“Action to take with attachments when classifying emails manually”: This configuration applies when classifying emails by drag and drop or by clicking on the classify button. If the option selected is “prompt user for an action,” there are two possible ways of choosing whether to classify the attachments or not:
- 1-Using drag and drop: A pop-up will appear asking you what to do:
- 2-Clicking the “classify to” button: from inside the mail or from the mail list, there will be a checkbox in the pop-up in order to choose:
Note: Images within the mail body are not considered as attachments to prevent saving unnecessary documents (as is the case with images included in signatures).
Email Attachment
When composing an email, you may send any of the following:
- Files uploaded to Feng Office
- files from your computer
Feng Office also provides the possibility of sending a link to the file instead of actually sending it over, which makes it faster, but in that case, the other user needs to log in to Feng Office to see the file in question (and have permissions wherever it is classified). By default, this option is disabled.. If you would like to make use of this, you have to disable the Attach contents option, right next to the attachment.
Group emails
Feng Office offers the possibility to send emails to a group of contacts from the “Contacts” tab.
Steps:
- Go to the “Contacts” tab and select the contacts that you want to send the group email to. Click on “Send Email.”
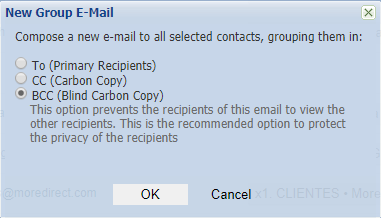
- The following pop-up window will appear, in which you will be prompted to choose the recipient type.
- Select the desired option and click on “OK”. This will take you to the email creation common form, with the recipients added in the field you selected in the previous step.
Mass Mailing (Newsletters)
The notifications and newsletters module allows the creation of emails and to selection of a set of contacts for sending the same message to all of them. The selection of contacts can be made through all of your database's relevant attributes. It also includes the option to include recipients on the field “To”, “CC”, or “BCC”. Users will also be able to track the delivery status of their newsletter.
For more information on how to work with the Newsletters Module, please access this article.
Note: This module is only available in the Professional (optional) and Enterprise (included) editions of Feng Office.
FAQ
Why are several received emails classified as Spam?
By default, the spam filter is rather high, so many emails may get into the Junk or Spam folder.
In order to decrease this level, you should do the following:
- Click on your name (top right corner)
- Go to Account
- Click on Edit preferences on your right
- Get to Email options
- Look for the option named Maximum spam level allowed and lower its value (maybe to 4 or 5, depending on your needs).
- Save the changes
Encryption
Does Feng Office support SSL/TLS encryption?
Yes, for incoming (POP3/IMAP) and for outgoing (SMTP) mails.1)
Does Feng Office support GPG encryption?
Not at this time (Feng Office 1.5).
Protocols
Does Feng Office support POP3?
Yes.
Does Feng Office support IMAP?
Yes. (Since Feng Office 1.2)
IMAP Support
Feng Office IMAP offers a basic sync feature for the Community Edition. Full IMAP sync is included in Feng Office´s Professional and Enterprise editions. For more information, please refer to this article.
3rd party webmail services
Does Feng Office support Gmail?
Feng Office auto-detects and auto-adjusts Gmail settings, though it might be a bit tricky sometimes to get it all running, so make sure you check out the Gmail configuration and troubleshooting guidelines.
Gmail Personal Account Configuration:
Enable 2-Step Verification:
- Navigate to the Google Account settings page. - Select “Security” from the menu on the left. - Under “Signing in to Google,” choose “2-Step Verification.” - Follow the prompts to set up 2-Step Verification by adding a secondary method of verification, such as a phone number.
Create an App Password for Feng Office:
- In the Google Account settings page, go to “Security.” - Scroll down to “Signing in to Google” and click on “App passwords.” - Select the app and device for which you want to generate the app password (e.g., “Mail” for Feng Office's email client). - Click “Generate” and follow the instructions to create the app password. - Provide the generated app password to Feng Office to use in their email client settings.
Corporate Account Configuration (Non-Gmail Domain):
- Enable “Less Secure App Access”: - Sign in to the Google Admin console using an administrator account. - Navigate to “Security” and then “Basic settings.” - In the “Less secure apps” section, click “Go to settings for less secure apps.” - Select the option to allow less secure apps. - Save the changes.
Does Feng Office support Hotmail?
Yes. You may receive your Hotmail account emails; however, you will not be able to send any email messages at all unless you subscribe to their services to enable this option.


